How To Deploy Static Website On Aws
self-taught developer.
Have you been learning how to build web pages using HTML, CSS, and JavaScript and want to show them off to friends through the internet? In this tutorial, you would learn how to create, configure, and upload files to AWS S3 buckets and share a public link with which those files would be viewed as web pages.
Table of Contents
- Prerequisites
- Creating an S3 bucket
- Uploading files to the S3 bucket
- Configuration of the S3 bucket
- Viewing your static website
- Conclusion
Prerequisites:
- AWS account.
- index.html and CSS file.
- Connection to the internet and a working computer.
STEP 1: CREATING AN S3 BUCKET
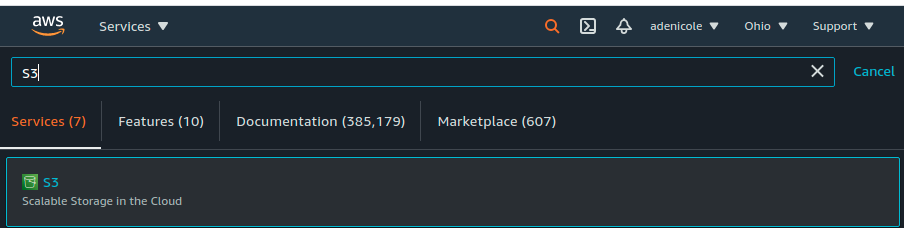
At the top of the AWS console, type in "S3" in the search bar and select it.
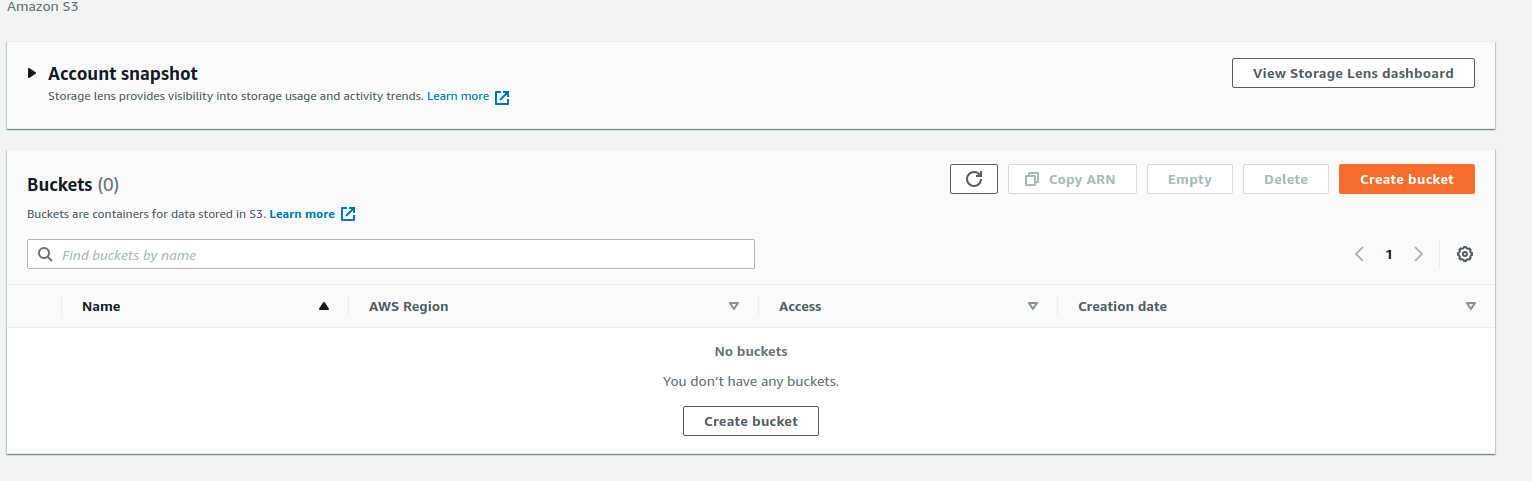
Click the "Create bucket" box.
Bucket names are to be globally unique, descriptive, without spaces or uppercase. Conventional practice is naming your bucket according to your AWS account ID
e.g. my-012345678902-bucket, where you replace 012345678902 with your AWS account ID.
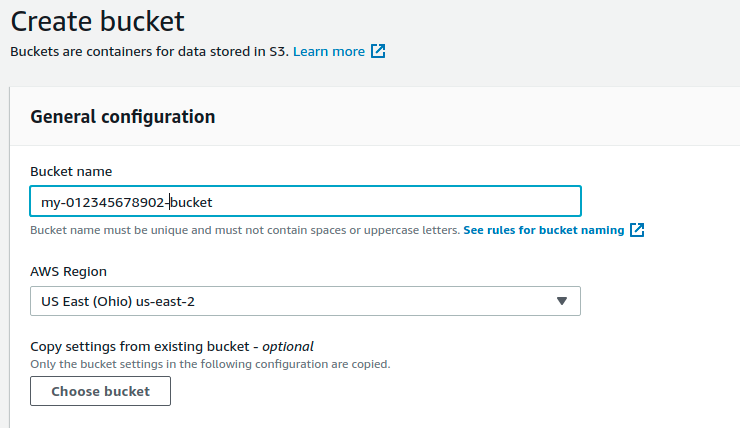
Click the "Create bucket" button at the bottom of the page after inputting your bucket name.
STEP 2: UPLOADING FILES TO THE S3 BUCKET
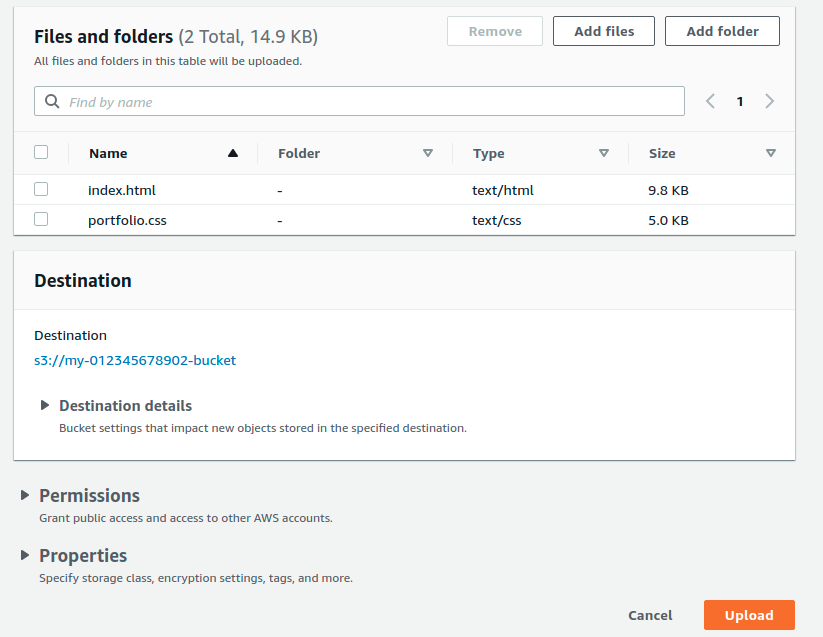
Click on your bucket name after it has been created.
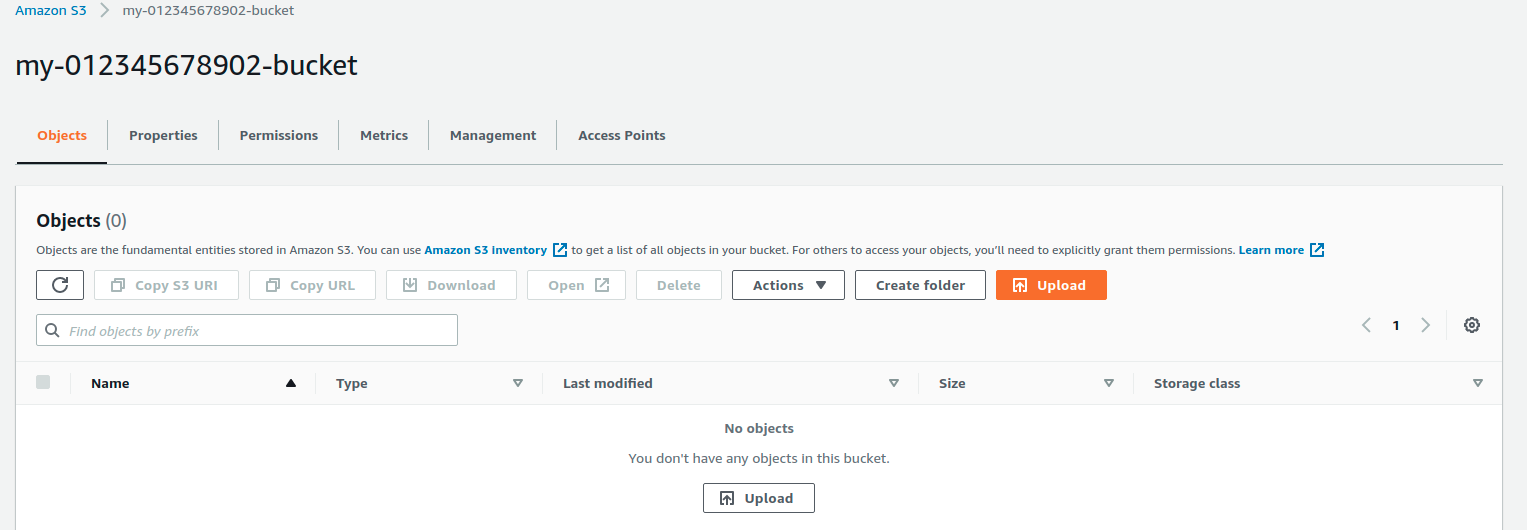
In the Object section, click the upload button, "Add files" and "Add folder" and upload the index.html and its CSS file (JavaScript, Images can also be added) from your local computer.
STEP 3: CONFIGURATION OF THE S3 BUCKET
This is done by unchecking the box, "Block all public access" and checking the affirmative box below it.
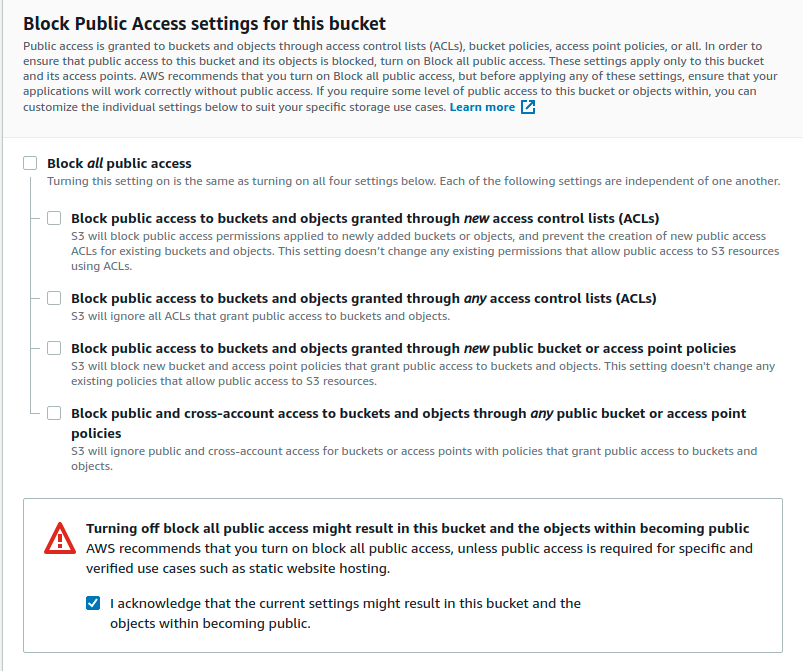
This allows your webpage to be publicly accessible.
Leave all other configuration as default and click create a bucket. Once the files have been created, click the bucket name to view its contents(Objects).
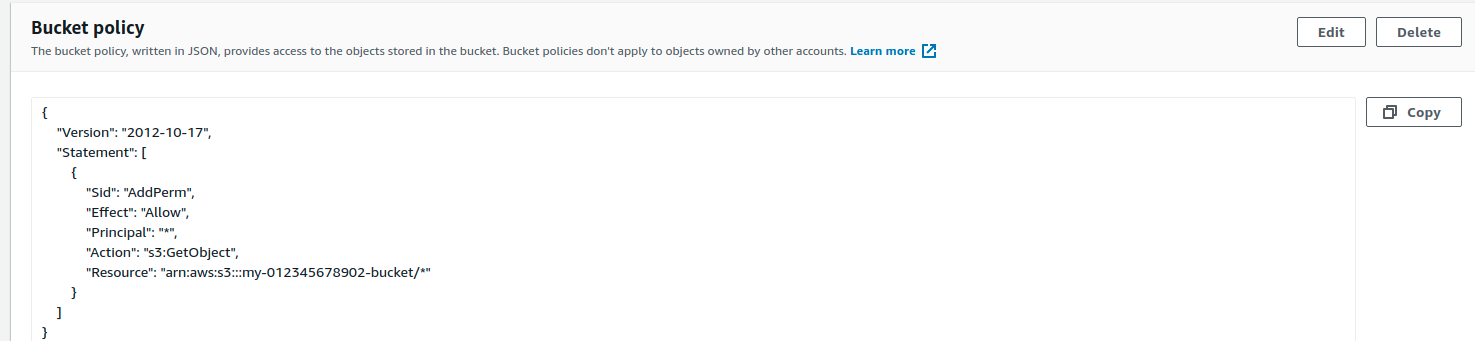
Next, set the bucket policy under the permission section: click edit and copy the code below to the empty section, replace my-012345678902-bucket with the name of your bucket and save.
"Version":"2012-10-17",
"Statement":[
 {
   "Sid":"AddPerm",
   "Effect":"Allow",
   "Principal": "*",
   "Action":["s3:GetObject"],
   "Resource":["arn:aws:s3:::my-012345678902-bucket/*"]
 }
]
}
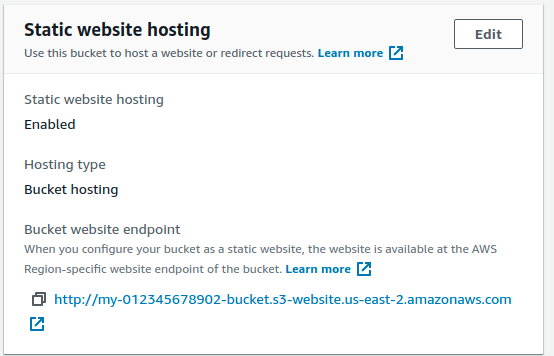
Next, click the properties section, scroll down to the bottom to edit the static website hosting section:
- Click the radio button to enable it.
- Input "index.html" in both index document and error document boxes.
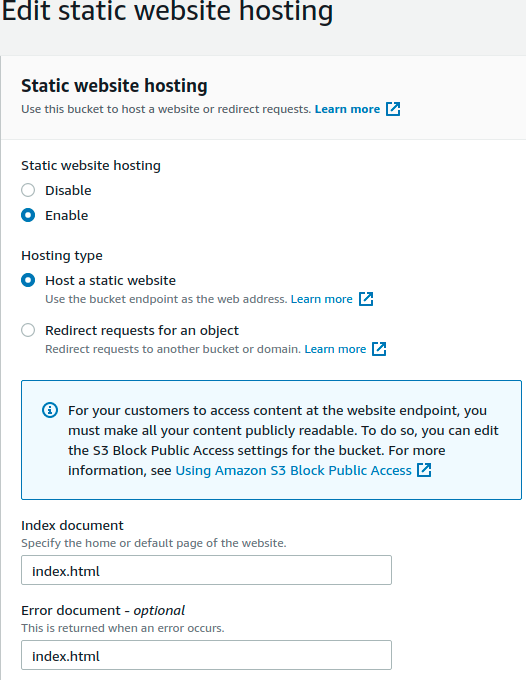
- Save and copy the link to somewhere accessible.
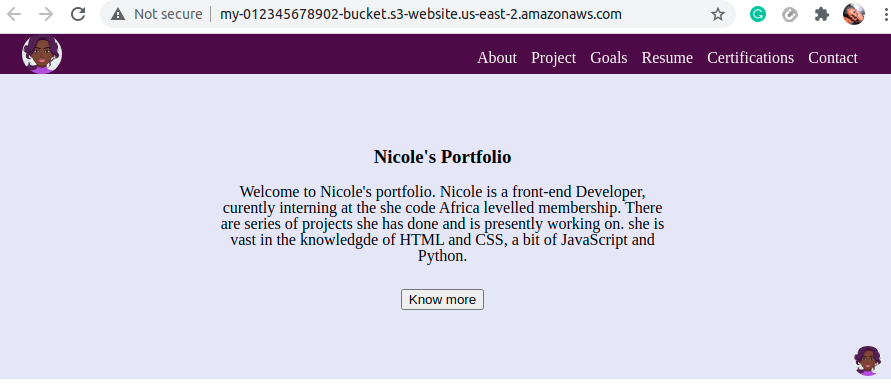
STEP 4: VIEWING YOUR STATIC WEBSITE
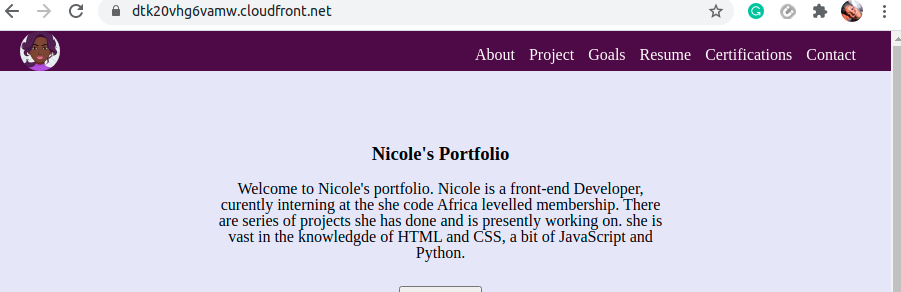
Copy the link from STEP 3 to your browser to view the static website hosted on AWS. You can also share this link with friends to allow them to view your static website.
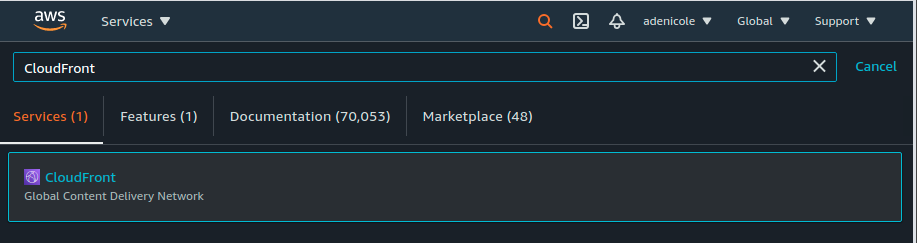
CLOUDFRONT
CloudFront is simply a web service that helps get your static and dynamic web content e.g. HTML, CSS, JS, IMG etc across to your user faster.
Search for "CloudFront" from the service text box.
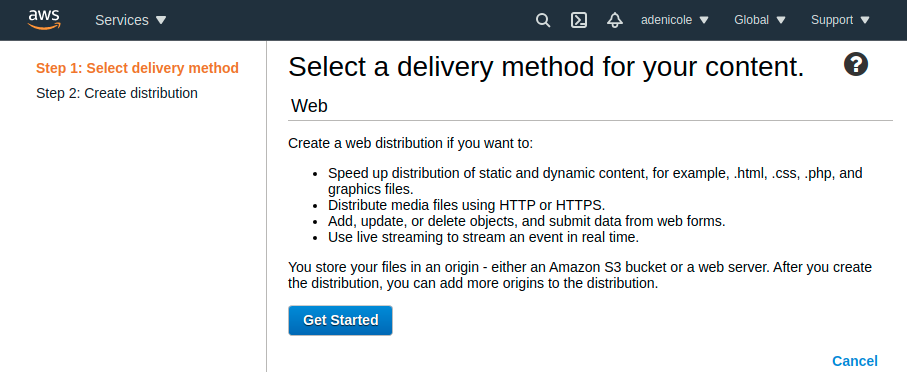
Click on Distribution from the CloudFront dashboard

Click on Get started.
- Origin Domain Name should be the S3 bucket you created in STEP 1
- Origin path should be / to show root level
- Restrict bucket access as Yes
- Origin Access Identity should be, "create a new identity"
- Grant Read Permission on bucket should be yes
- viewers protocol policy should be "Redirect HTTP to HTTPS
- Default Root Object should be index.html (Default landing page)

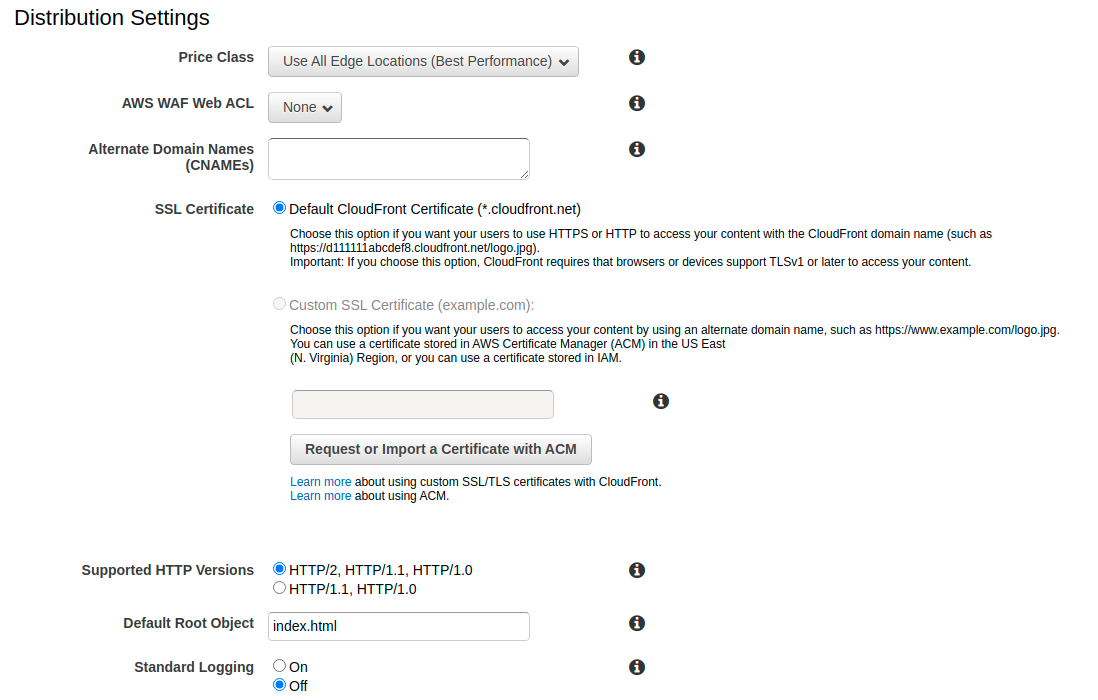
NOTE:
- All other configuration should be left as default.
- It might take up to ten minutes for the CloudFront Distribution to be created.
- When the CloudFront status changes from "In Progress" to "Deployed" it attaches to the S3 bucket and caches its pages, after the caching is complete, the domain name URL stops directing to the s3 object URL.

CONCLUSION
In this article, you have learnt about S3 bucket creation, configuration, and uploading of files to deploy a static website on AWS as well as the use of CloudFront. Stick around to get more content about AWS services.
p.s: Do not forget to delete the S3 bucket later on, after you have deployed the static website. This is to avoid incurring unnecessary charges.

